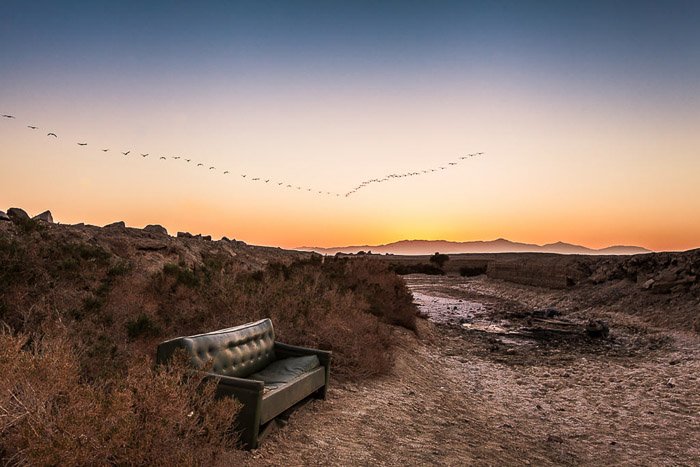
The results, otherwise known as HDR, can feel much closer to what the human eye sees. Lightroom’s Photo Merge tool is ideal for you to begin experimenting in HDR photography.
How to Merge Photos in Lightroom
HDR can be done in many different ways and to varying degrees. There are even programs specifically for creating HDR images. Lightroom offers a tool within it called Photo Merge. The Photo Merge tool is the only way to create HDR in Lightroom from multiple photos without relying on any other program. It can be tempting to create an HDR effect with all your photos. But it’s important to know that sometimes HDR is not the ideal edit. Of course, the best way to learn the difference is through experimentation! Consider the final look that you want for a newborn portrait versus an urban landscape. Both may require you to play with shadows and highlights. But you should avoid any sort of HDR processing on the newborn portrait.
How to Merge Photos Into a Single HDR Photo
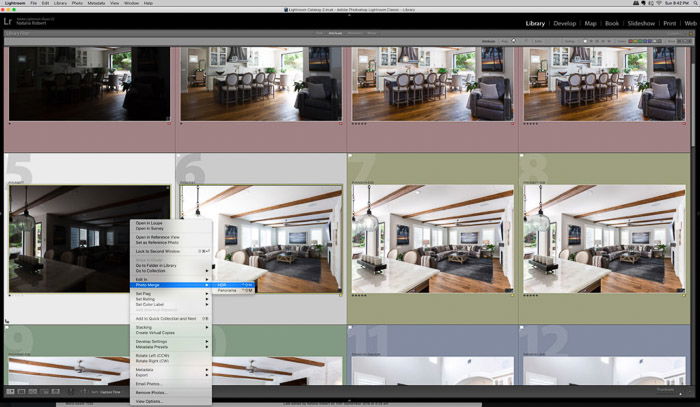
Ideally, you want to work with RAW files. The Photo Merge tool seems to rely on its depth of file information to create a seamless look. When shooting, you’ll need to bracket at least two shots so that you have range of exposure. This means exposing one frame for the brightest spot and one for the darkest spot. If needed, you can take some shots that are in between, depending on how big of a range of light there is. It’s ideal to shoot with a tripod. This way all your bracketed shots line up. This makes layering them for HDR processing much easier. In Library mode, select your shots. You can then access this tool in three different ways:
Right-click (or Control + click on a Mac) for the menu to appear. Hover over “Photo Merge” and another small menu appears. Select “HDR” from this menu. Press Control + H Go to “Photo” menu at top of screen. Then select “Photo Merge.” Then select “HDR.”
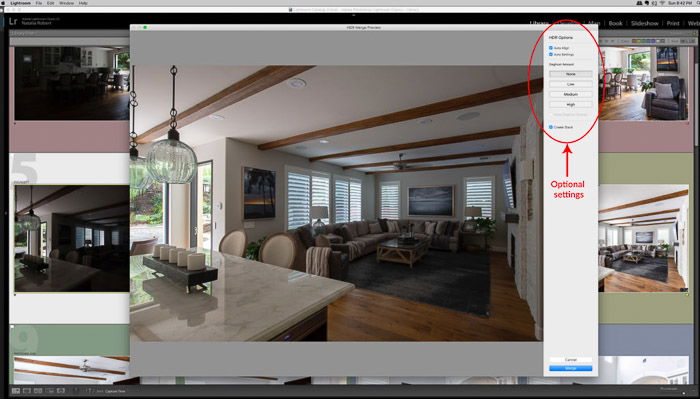
Regardless of how you access this tool, Lightroom will then open a new smaller window for you. That’s where your new HDR image will appear!
Optional Settings to Know
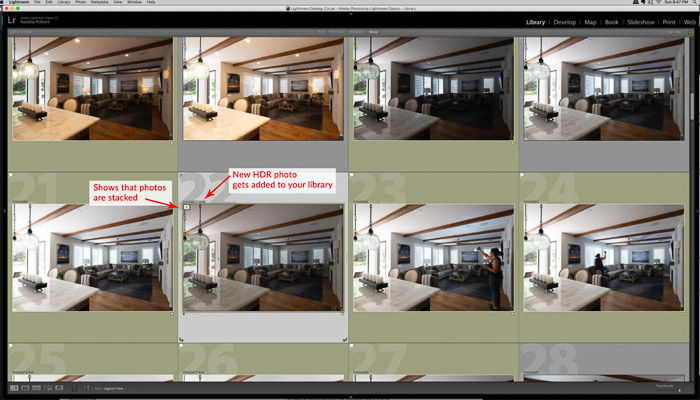
You’ll notice some settings appear on the right side of the pop-up window. Auto Tone—I recommend having it checked because it helps ensure that the tones are even throughout the photo. Auto Align—This tells Lightroom to line things up for you as best it can. I generally would leave this box checked. It ensures that if there was any slight bump between shots, it will get taken care of. Deghosting—I would generally recommend to leave this option unchecked. Unless there’s a specific issue that you feel it can address. The Deghosting tool helps if there’s an object that was moving in your frames. This would look semi-transparent when layered. This tool adjusts those objects so they don’t show any transparency in the overlay. However, there’s really no control over how this tool is applied other than how strong you want it (none, low, medium, high). Sometimes you end up with strange lines or distortion in other parts of the photo. I recommend using this tool sparingly. Create Stack—This option was added to Lightroom in 2018. If this box is checked, Lightroom stacks the original images together with the HDR image. It allows you to keep a cleaner look in your Library. This one is a personal preference and doesn’t make any difference in the actual processing of the photo. Experiment with it and see what feels best for your workflow! I like to have all my shots visible. And I already do my own series of labeling. So I leave this box unchecked.
Pros and Cons of Using Photo Merge in Lightroom
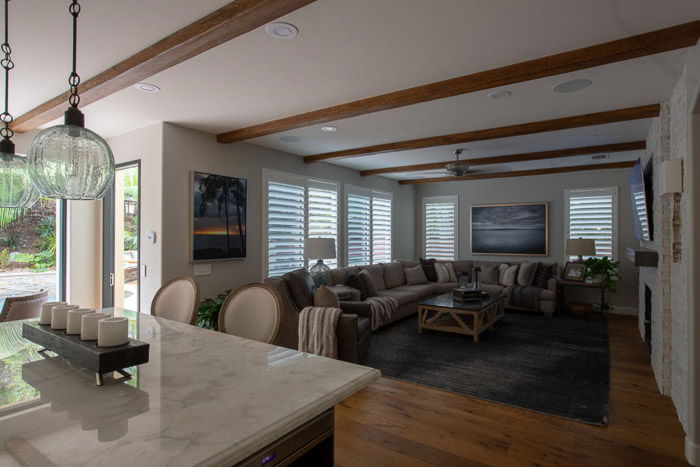
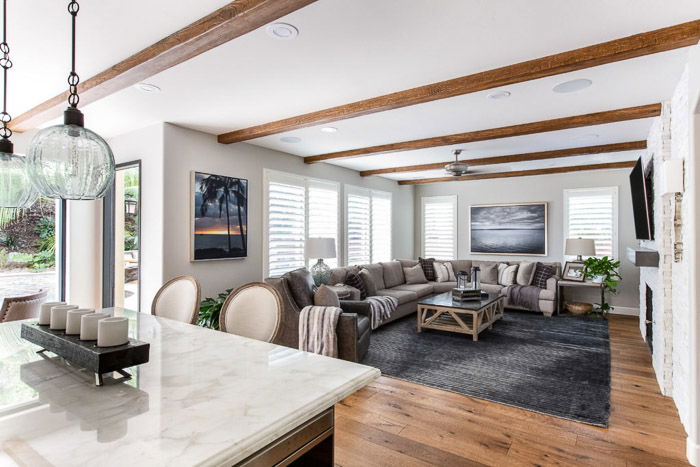
The Photo Merge tool in Lightroom is a great way to begin experimenting with HDR photography. Is it a good idea for all your work, though? Probably not. As you play with this tool, you’ll also come to find its limitations. The main limitation is that it doesn’t give you much control. This includes over how the HDR look is created, how strong of a look it is, or the ability to mask any portions of the image. For this reason alone, I find this tool to be ideal for working with landscapes. For example, my main genre of photography is interior architecture. This tool would not work well for me! It does a great job of blending layers for merging the outdoor views through windows. But it offers no control over how it treats the rest of the image. The example below shows how the interior of the room is also darkened. This is Lightroom automatically balances it out with the darker exposure. Ideally, I would only want the outside view to be balanced out and blended. Photo Merge doesn’t offer that degree of control. You would find similar issues when editing family portraits. You may want the setting sun in the background to be evened out. But you wouldn’t want the family’s faces to also get any darker. The major pro to using the Photo Merge is its simplicity. For applying an overall HDR look, this tool is excellent! At a beginner level, it offers clean HDR photos from a very simple process. It also lets you focus on learning how to shoot bracketed frames so that you can then edit for HDR.
Conclusion
HDR can mean different things to different photographers. For someone just starting out, the Photo Merge tool in Lightroom offers an extremely simple way to create it! By making the merging process so simple, it lets you focus on how to shoot bracketed frames and your composition. Check out our Effortless Editing with Lightroom course to master post-processing!