No more grabbing the backpack and tripod. Your cellphone and our iPhone photography tips are all you need to take better iPhone pictures. [ExpertPhotography is supported by readers. Product links on ExpertPhotography are referral links. If you use one of these and buy something, we make a little bit of money. Need more info? See how it all works here.]
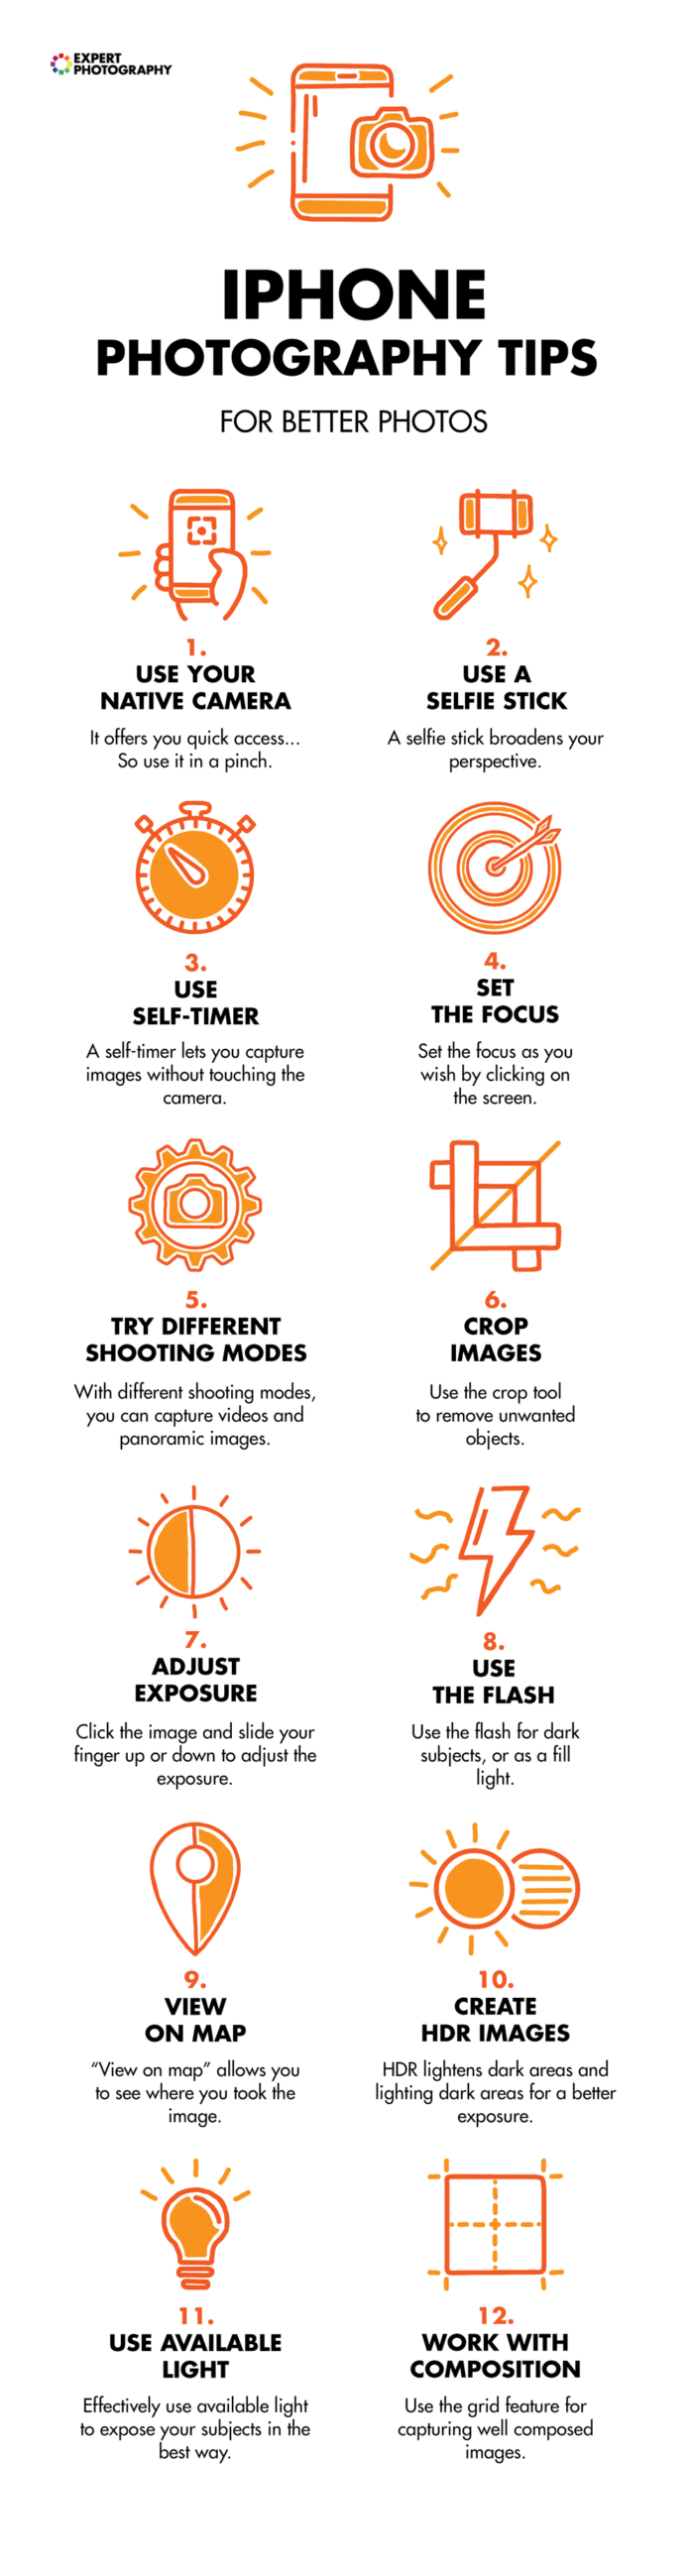
1. Iphone Photography: Swipe for Easy Access to Your Camera
You never know when you might stumble on something that needs a rapid response to capture the shot. But every time you have to unlock the phone before selecting the camera app. Head over to your iPhone’s settings and make sure you can quickly swipe the screen left and the camera opens up ready to go.
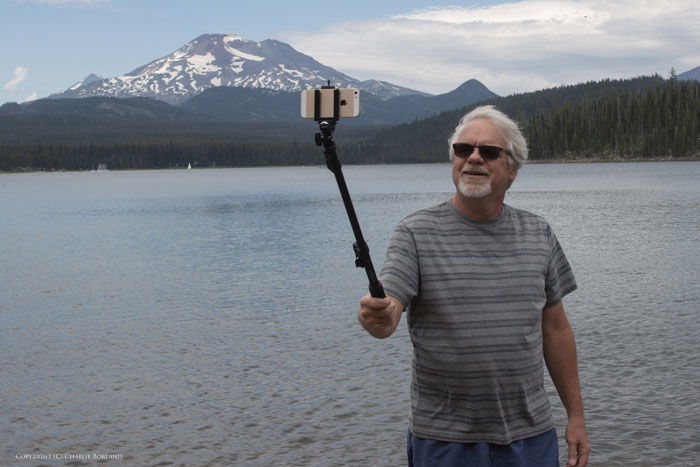
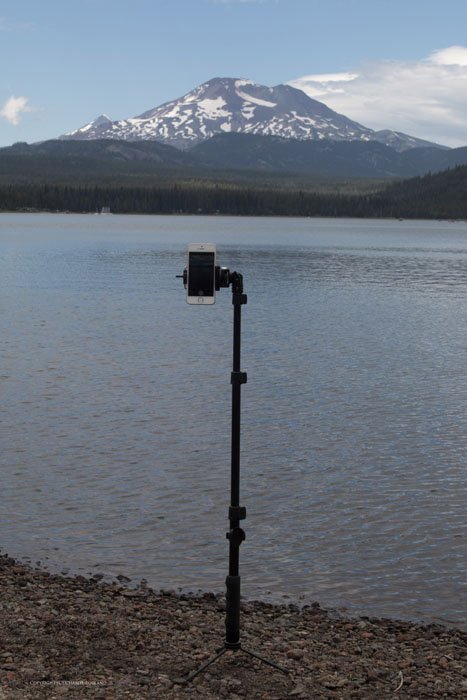
2. Use a Selfie Stick to Broaden Your Perspective
To some degree, the smartphone gets a lot of credit for the selfie craze we see today. We don’t need to ask a stranger to take our picture in front of an amazing background. What’s great about a selfie stick is that you are no longer limited to the length of your arm. A selfie stick allows you to capture a broader perspective. This feature can be convenient not only for selfies. If the stick has legs, you can use it as a tripod. This is especially helpful in low light conditions. That’s when camera shake might cause blur.
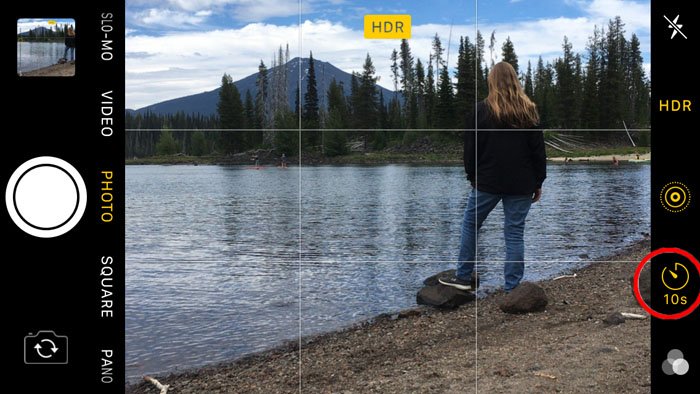
3. Try the Self Timer Feature
Use the self-timer feature to capture a different style of selfies or any scene for that matter. The timer can be set for 3 or 10 seconds. The time you choose depends on your preferences. Three seconds is not a lot of time but can be useful when you want to take a picture without touching the shutter button. The 10-second feature is better if you want enough time to press the shutter and then get in front of the iPhone.
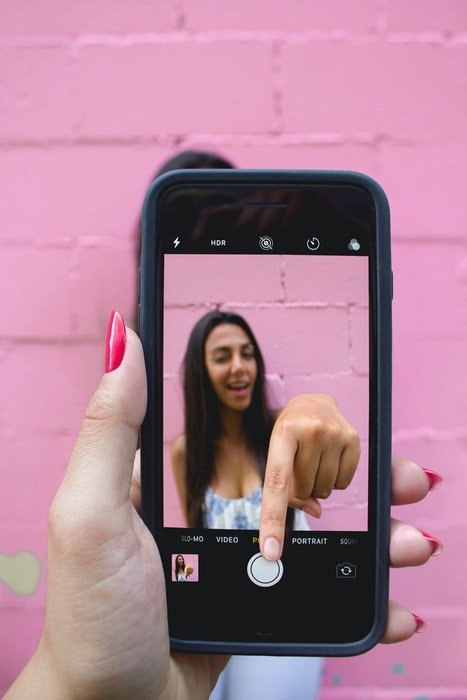
4. Set the Focus By Touching the Screen
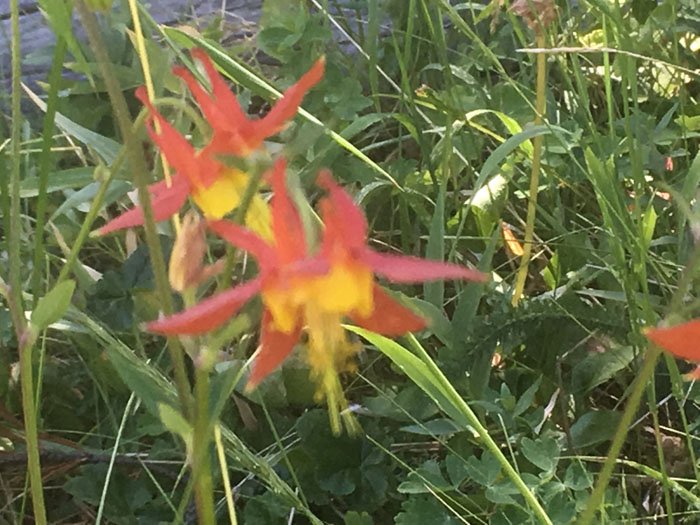
Most of the time, the focus will be sharp throughout an average scene due to the iPhone’s tiny sensor. But if you take close-up photos, you need a specific part of the picture to be sharp. Using the set focus feature will ensure that your main subject is sharp.
This photo is a close-up of the flowers. As you can see, the focus is not on the flowers and is more average for the scene.
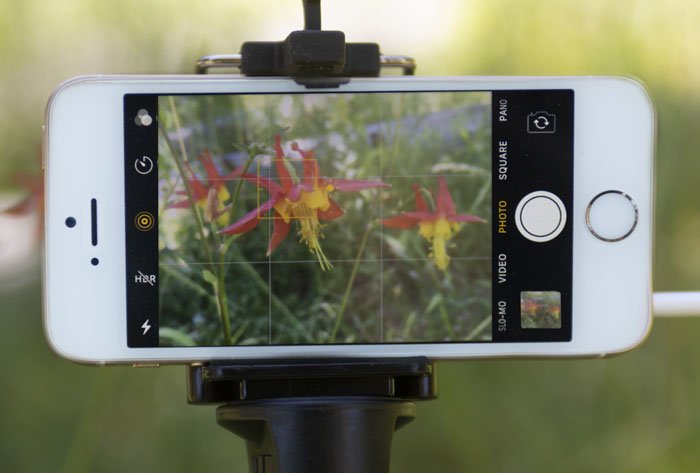
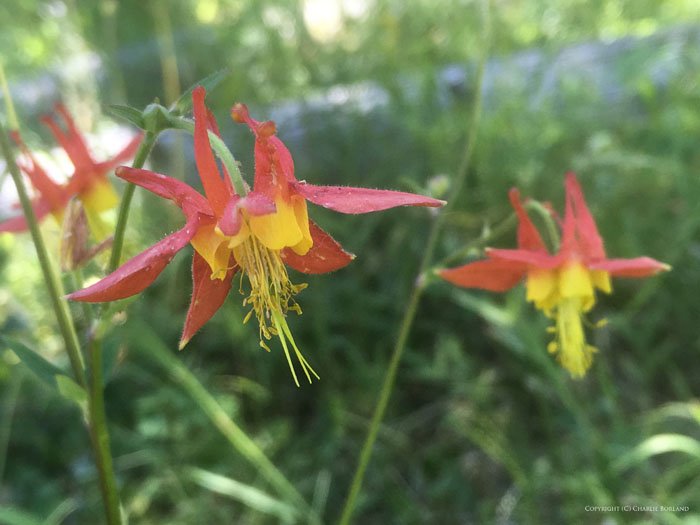
The solution is simple. Touch the iPhone’s screen and place the yellow square in the area you want to be in focus. By placing the subject closer to the camera and making it in focus, the depth of field appears shallow. This throws the background more out of focus for a nice effect.
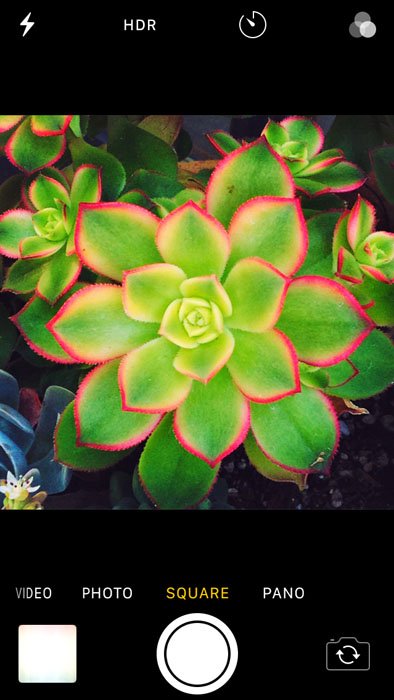
5. Work With Different Shooting Modes
Depending on the Apple iPhone model (whether it’s an iPhone 8, iPhone Xs, iPhone 11, etc.), there are several modes you can choose from. These include:
Time-Lapse and Slo-Mo; Video; Photo (4×3 Ratio); Square (2×2); Pano (for panoramas); Portrait Mode Ultra-Wide Mode Night-Mode Deep Fusion and Smart HDR
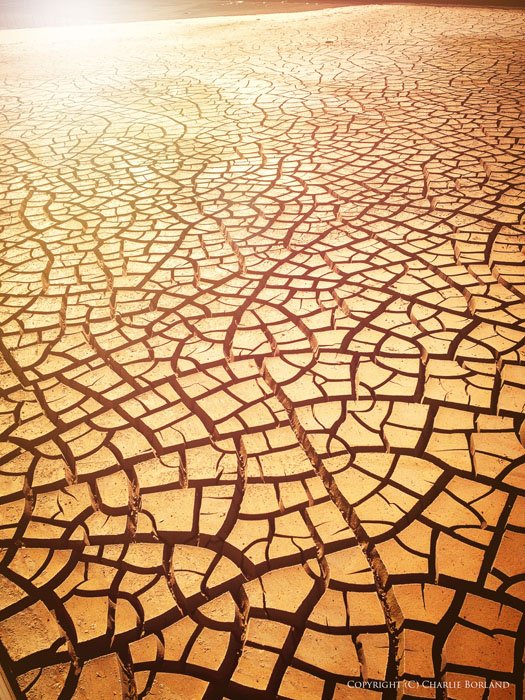
While capturing still photos, the 4×3 Photo mode is a perfect ratio for many scenes. Take this cracked mud in the desert. The foreground is close to the camera and the top of the photo is further.
Using the 4×3 Photo mode gives the impression of depth.
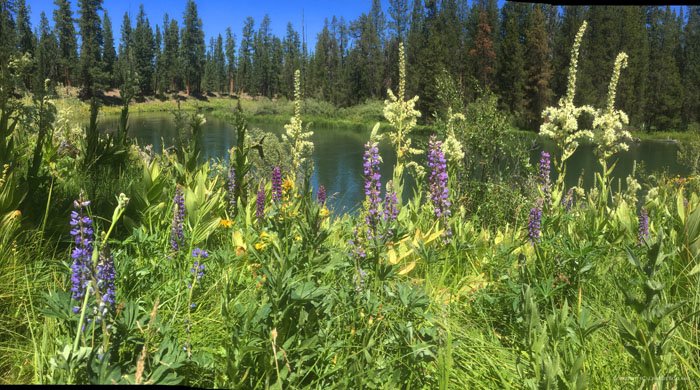
The square mode is also very useful when you have a subject that fills the frame. The Panorama feature can be a lot of fun and is very easy to use. Select the Pano mode, touch the shutter button, and then move the iPhone from left to right. It works best if you have a tripod to keep the camera level. If you don’t have one, try your best to keep the camera level while panning left to right. You might notice in the photo below that it has a black stripe in the lower left and upper right. This is the result of the iPhone not maintaining a level position while moving left to the right. The camera was higher on the left and lower as it approached the right side. You can crop this out though or try again holding your phone on an even level.
6. Crop Your Images For a Better Result
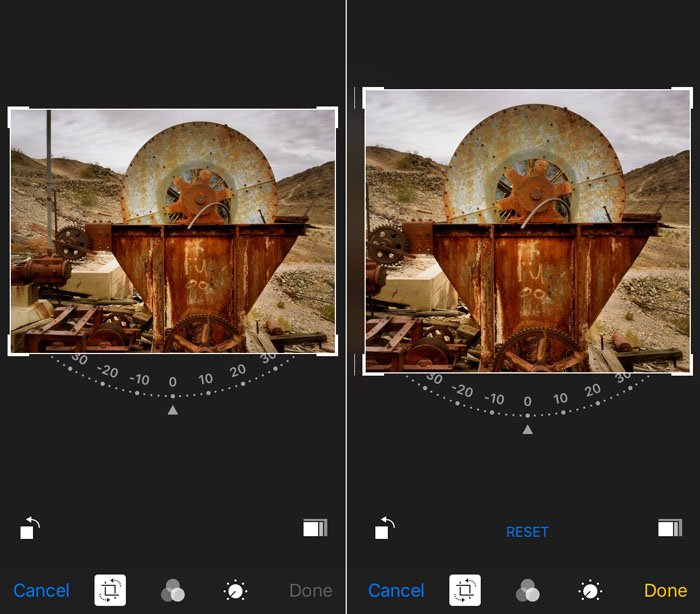
Sometimes you might capture an image and later discover something in your photo you want to crop out. That was the case with this old rusty piece of mining equipment. I did not care for the vertical pole on the left side of the background and decided to crop it out. This left the subject more centered in the frame. To use the Crop feature, choose the picture from the camera roll and open it, then select Edit. At the bottom next to Cancel, is the crop tool. Click on that, and then you can drag the sides or corners anywhere you wish on the image. And if your horizon is tilted, use two fingers to rotate and straighten. Or drag on the dial right below the picture.
7. Adjust the Exposure in a Manual Way
The iPhone’s metering is, for the most part, automatic. Average scenes with average lighting may have correct exposure. But there may be times where the iPhone falls short. Adjusting exposure is quite easy and can make a huge difference in the photos.
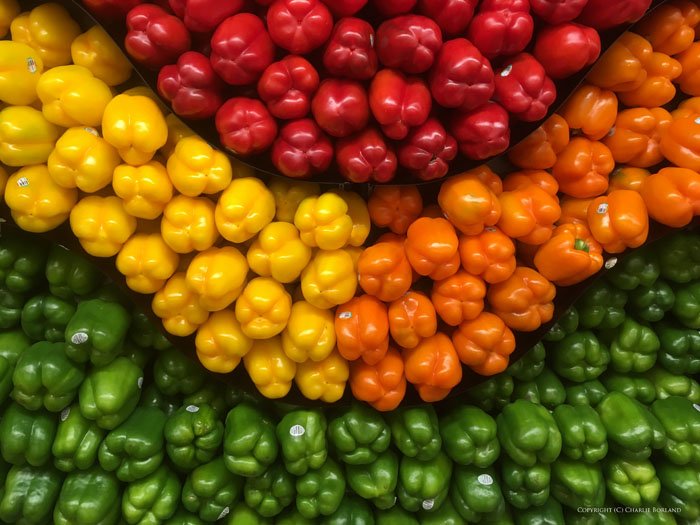
This full tonal range image is easy to meter and expose.
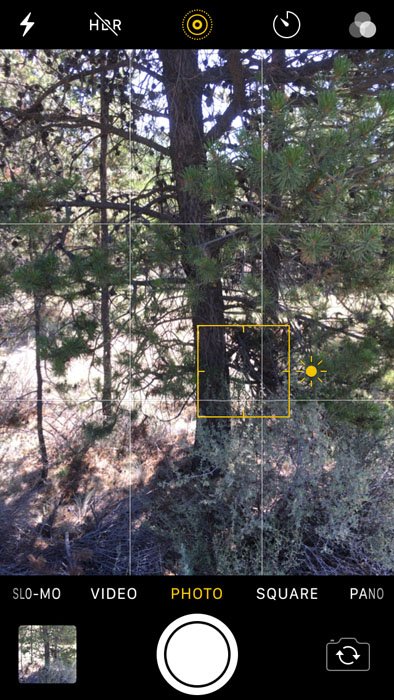
Here is a scene I chose due to the high contrast of backlighting. This exposure is the iPhone’s average metering. It preserved some shadow detail and highlight detail. While that is what it is designed to do, it feels too dark. That makes it a perfect image for using the spot metering feature.
Wherever you tap on the screen to set focus, you also are choosing that spot to meter exposure. I clicked on the shadows of the tree trunk. The result was an adjusted exposure for better shadow exposure. This is a good approach for selecting zones that need a change in exposure. But it won’t work for everything. In that case, you can adjust the global brightness with the exposure slider.
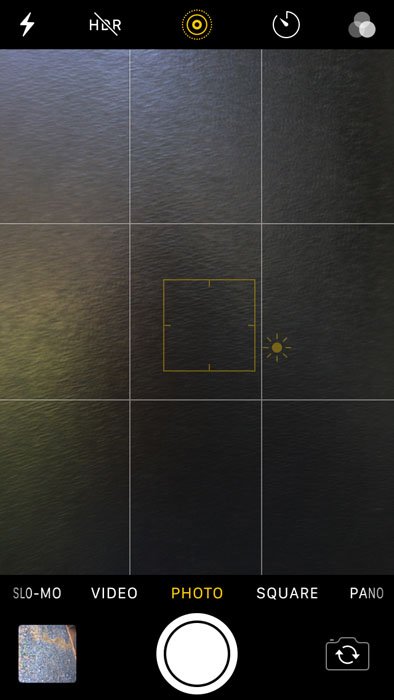
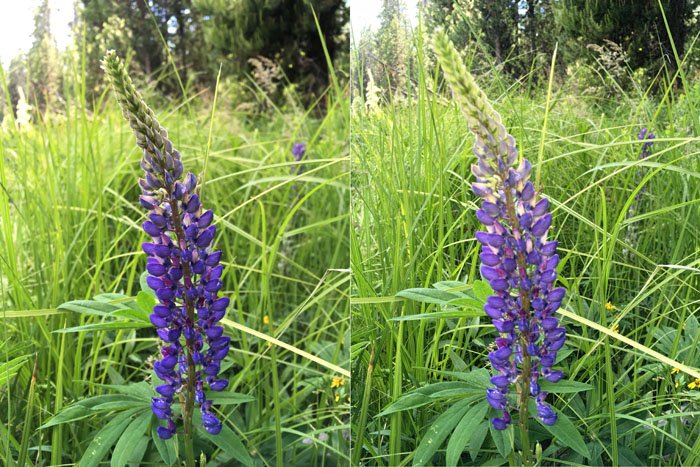
Start by tapping on the screen where you will see the Sun symbol next to the yellow box. The sun symbol is the slider to adjust exposure so slide the symbol up or down to lighten or darken. The image below is a perfect example of adjusting global exposure. There are high contrast lighting and deep shadows in the rear. The camera exposure was off quite a bit. It compromised to maintain detail in shadows and some highlights. To get a correct exposure, I used the sun slider. I darkened the whole image until the highlights were set to proper exposure. This created a darker background, but that is okay since the subject is the flowering plant.
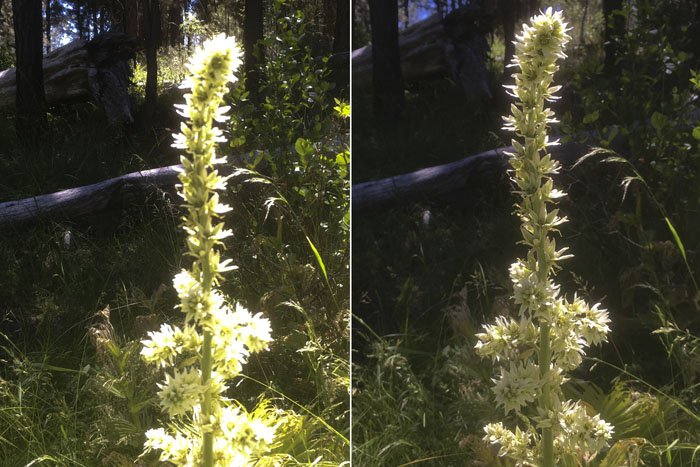
8. Use the Flash in Shade
Adding Flash to your subject can be very useful in some situations. The iPhone flash is not very powerful, so its usefulness is limited to a few feet. In bright sun, the flash does not do so well. But in the shade, it can be a different story. If you look at these wildflower photos, you can see on the left the photo with no flash. On the right, I added a flash fill. The flowers are brighter while the background stays more or less the same.
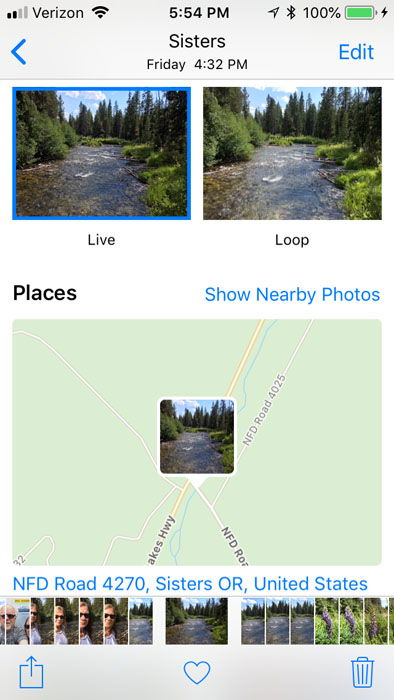
9. Use ‘View on Map’ to Set the Location
Have you ever captured a photo and later wondered where you took the photograph? It has happened to me many times over the years. But the iPhone has a feature called View on Map. It is quite simple to use. Open your camera roll and find the photo you are wondering about. Once the photo is open, slide up from the bottom, and the map shows up with the location. Adding the location to your iPhone photos can help you to boost your social media presence as well. People often search for images that were captured at a specific location.
10. Create HDR Photos on Your iPhone
HDR stands for High Dynamic Range. On IOS devices, the camera takes three exposures: light, dark, and normal. Then it blends them together to create an image with more detail throughout the highlights and shadows. This is a very valuable feature. Use it when photographing high contrast scenes with dark shadows and bright highlights. Let’s look at these two photos.
Comparing these two photos, you can see the obvious difference. The left image has no HDR applied while the right image is an HDR image. Start by comparing the two columns on the left side. The HDR image is a little greyer than the left image. Same with the beach. The right image seems more of a proper exposure as the sand, people, and sky are a hint darker.
11. Use the Available Light
Mastering all the settings is necessary for creating great photography with iPhone. But you have to keep in mind the creative side as well. Great lighting and composition are also important when you wish to tell a story with your iPhone photos. Outdoor natural light is defined by Quality, Quantity, Direction, and Color. The quality of light often includes how soft or hard the light is. Quantity relates to brightness. Lots of light results in brightness, while darker conditions have less available light. Direction defines the angle the light is coming from. Color is very simple: the color of the light. An overcast day outside produces very soft light. But a cloudless sky at sunrise will create light with a lot of contrast. Harsh, late afternoon sunlight was perfect for the scene below for several reasons:
The scene consists of highlight areas with a few shadow areas. The light is very directional coming from the side, which helps define the textures in the scene.
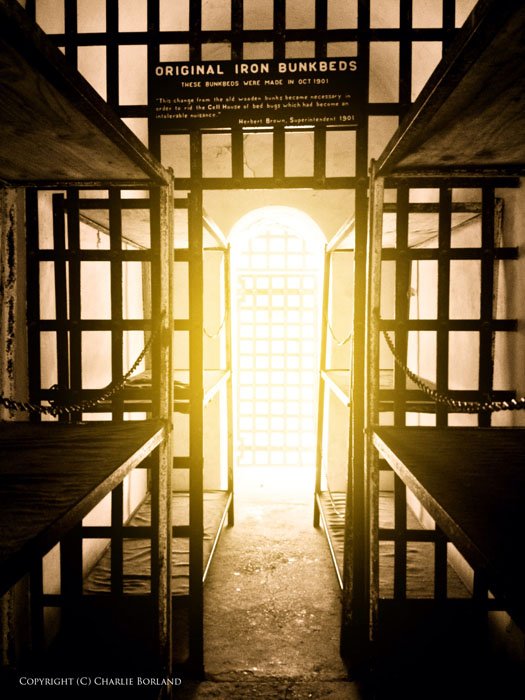
Backlight coming through the door of this historic jail cell creates a lot of contrast. This results in many bright tones and dark tones with limited mid-zones.
Side lighting works very well when you wish to emphasise fine details. Here, the texture of the rusting metal, bolts, and seams is enhanced. Side lighting makes this old mining equipment stand out.
The color of light is often most notable at sunrise or sunset, where the light turns very golden. This creates a warm and fuzzy impression. Cool or cold light is often blue in tone and can create the impression that the temperature is cold outside. For this beach scene in Belize, the amber color of the scene provides that warm tropical feel.
12. Don’t Forget the Rules of Composition
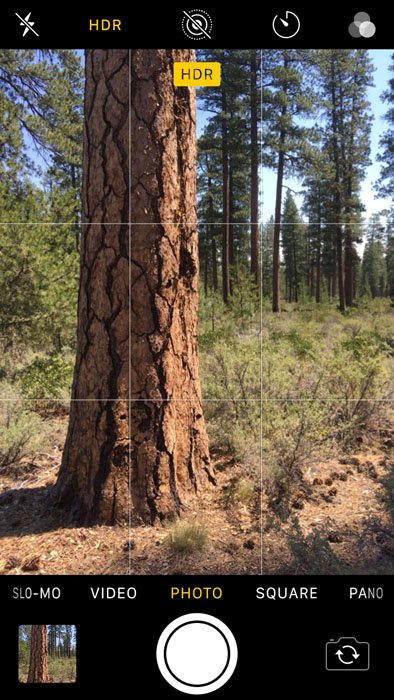
The composition is also a crucial ingredient to great iPhone photography. Here are a couple of examples where the rules worked very well. There is a great tool on the iPhone, and it is the grid feature. These lines exemplify the Rule of Thirds. They divide your composition into horizontal and vertical lines. You can place a subject along any line. Or where the lines intersect (visual hotspots).
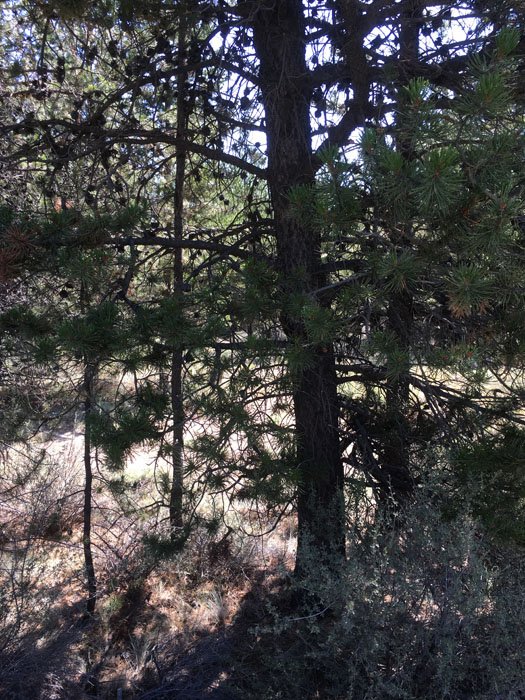
The pine tree is placed on the 1/3rd left vertical line. By placing it there, the other 2/3rds of the scene are the background. This approach creates scene depth.
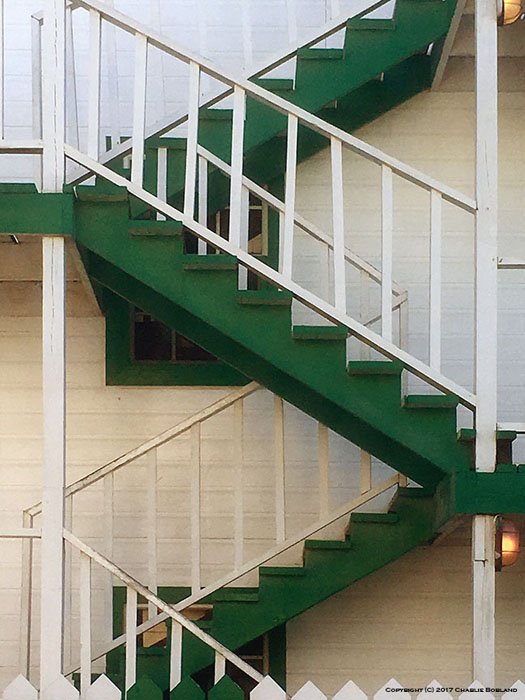
The diagonal lines of this stairway create a Z pattern, allowing our eyes to follow it to the top of the picture.
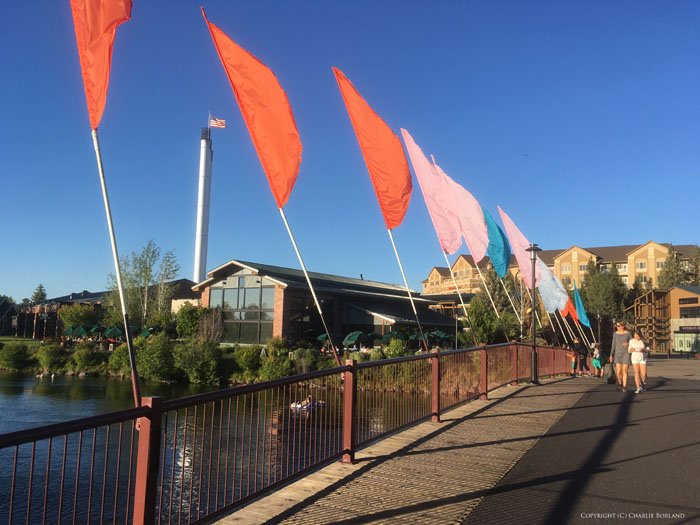
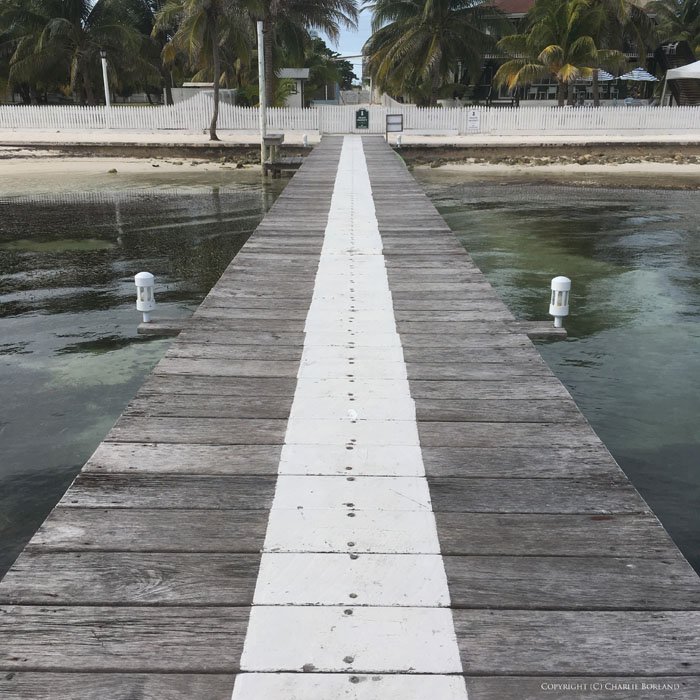
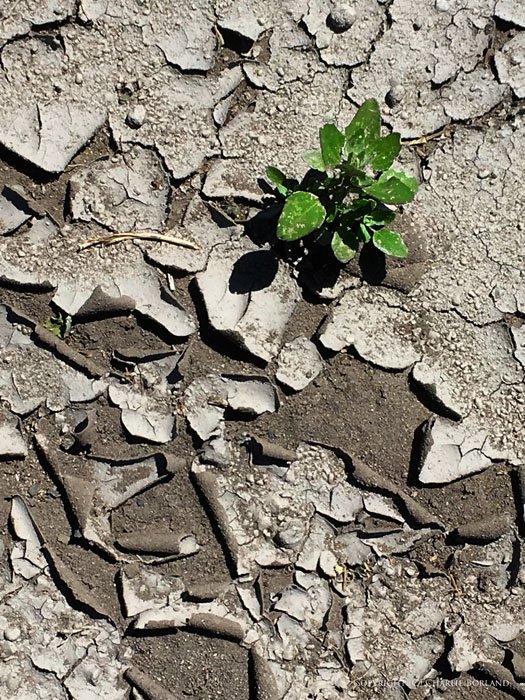
This line on a dock has a leading line composition. It forces the viewer to follow the line to the distance. Positioned in a 1/3 hot spot within the composition, this green plant gets more attention. It draws the viewer to the plant surviving in a harsh environment.
Conclusion
The iPhone functions as a fantastic camera, capable of capturing much of what a DSLR can. These iPhone photography tips will guide you in creating better photos with your iPhone. Remember to master the shortcuts the iPhone has. Don’t forget to look for great lighting and expressive compositions. We have a great guide to transferring your iPhone photos to your computer you can check out too.


![]()